Email Setup: Outlook
Setup Email on Outlook (IMAP)
Use the instructions below for your version of Outlook.
Large mailboxes: The first sync can take a few hours to a few days.
Important: New Outlook for Windows
Microsoft's New Outlook for Windows routes IMAP accounts through Microsoft's cloud. This can cause setup failures and may not be ideal if you want a direct connection to your mail server.
For the most reliable setup, use Classic Outlook:
- Open Outlook.
- Find the Try the new Outlook toggle in the upper-right corner.
- Turn it off.
- Restart Outlook.
Outlook 365
Outlook 365 no longer supports IMAP Autodiscover in the same way older Outlook versions did, so manual setup is usually required.
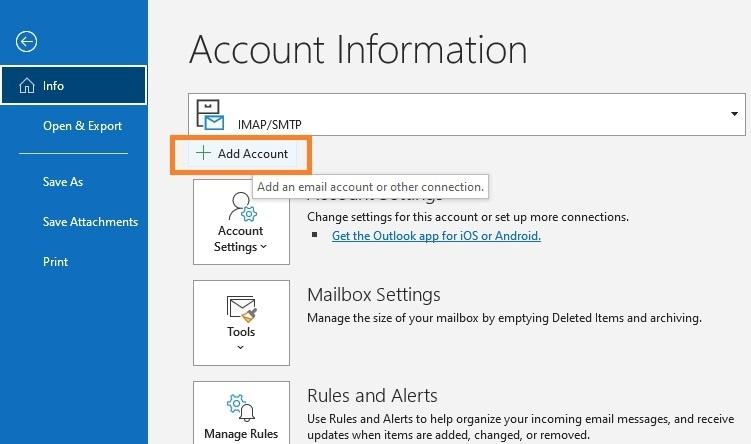
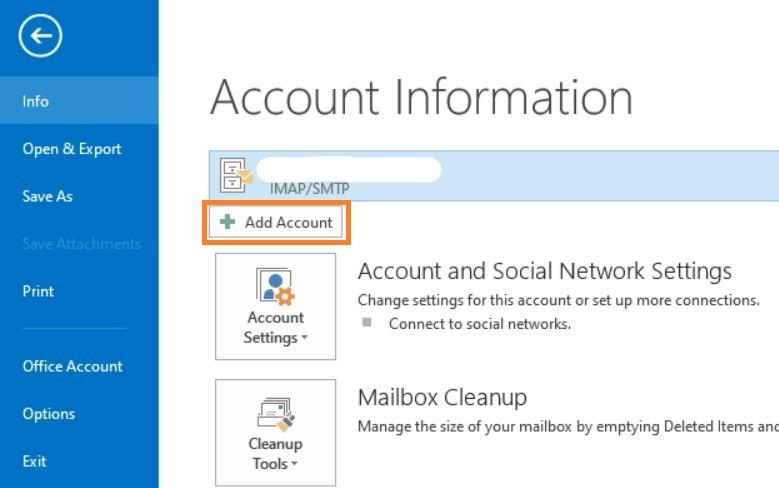
- Open Outlook.
- Click File.
- Click Add Account.
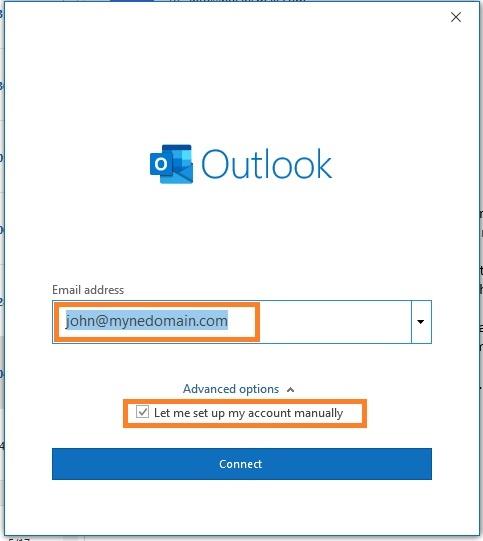
- Enter your full email address.
- Select Let me set up my account manually.
- Click Next.
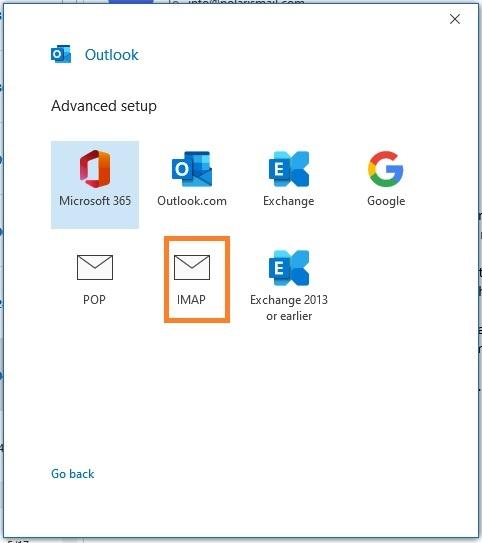
- Choose IMAP.
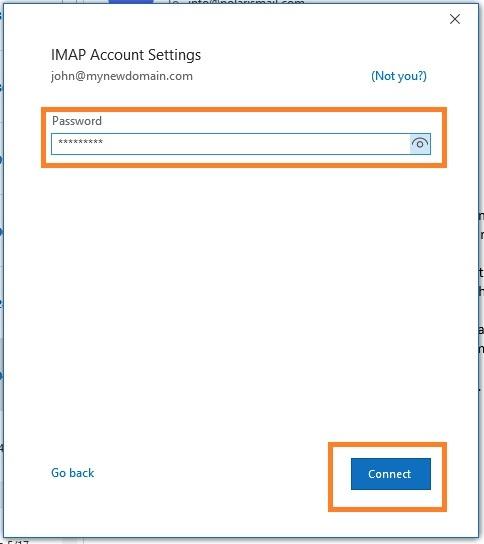
- Enter your mailbox password when prompted.
- Outlook will begin syncing your mailbox.
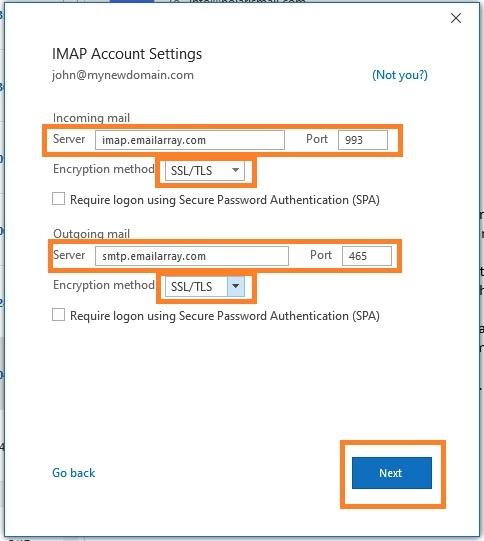
Use these server settings if Outlook asks for them:
- Incoming server:
imap.emailarray.com - Incoming port:
993 - Incoming encryption:
SSL/TLS - Outgoing server:
smtp.emailarray.com - Outgoing port:
465 - Outgoing encryption:
SSL/TLS - Username: your full email address
- Password: your mailbox password
Outlook 2013 / 2010
- Open Outlook.
- Click File.
- Click Add Account.
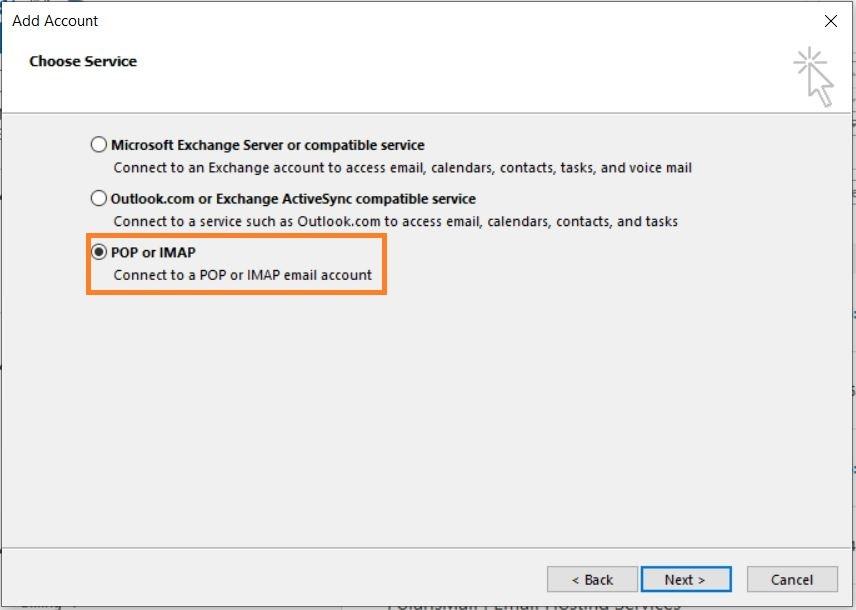
- Choose POP or IMAP.
Automatic setup
If your domain has Autodiscover configured:
- Enter your full name, full email address, and password.
- Click Next.
- Click Allow if prompted for
autodiscover.xml. - Click Finish.
Manual setup
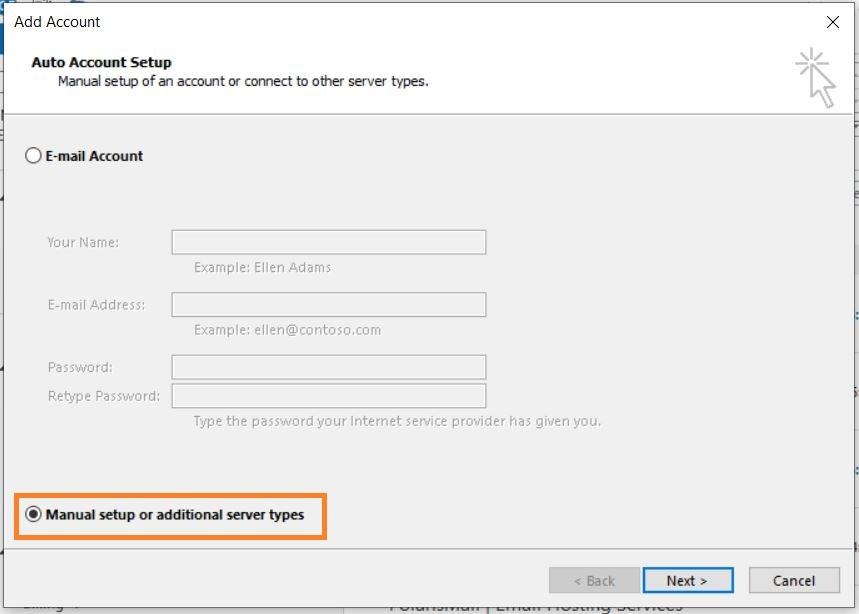
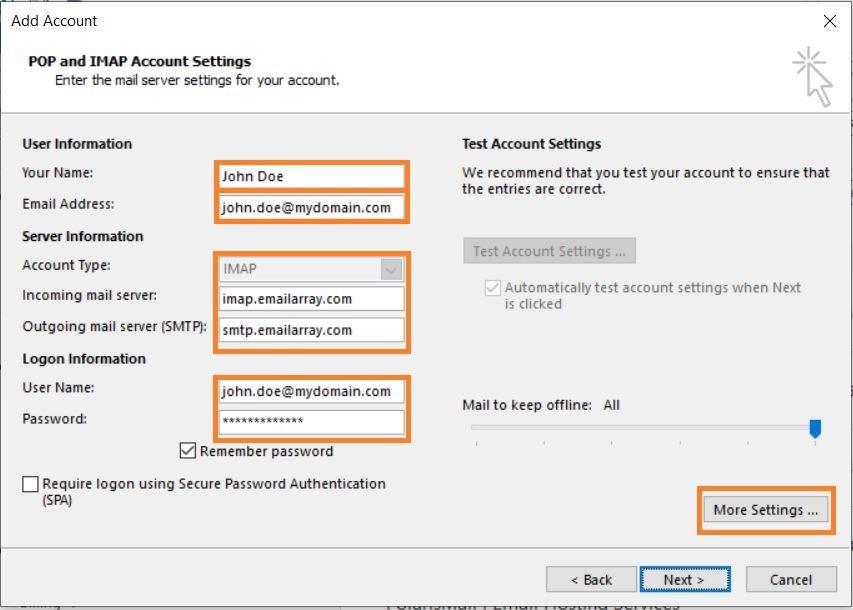
- Select Manual setup and click Next.
- Enter your full name, email address, and password.
- Use these settings:
- Account Type:
IMAP - Incoming mail server:
imap.emailarray.com - Outgoing mail server:
smtp.emailarray.com
- Account Type:
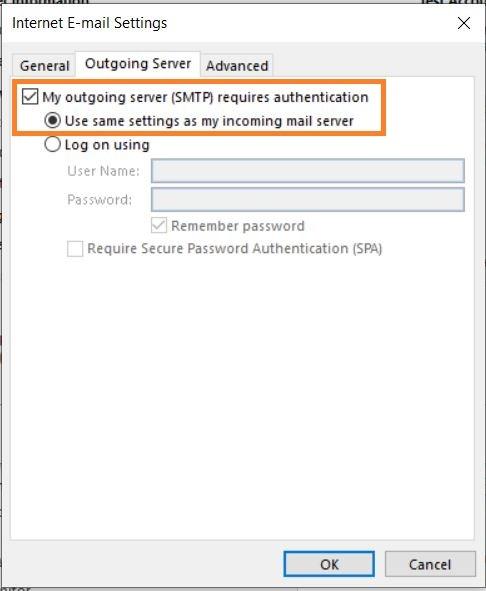
- Click More Settings.
- On the Outgoing Server tab, enable:
- My outgoing server (SMTP) requires authentication
- Use same settings as my incoming mail server
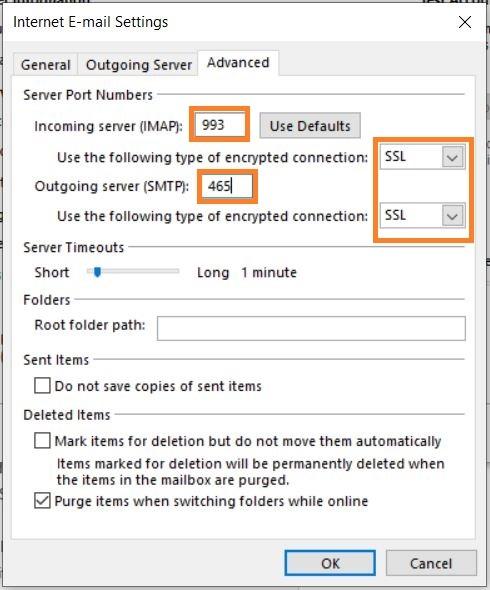
- On the Advanced tab, confirm:
- Incoming port:
993 - Outgoing port:
465 - SSL/TLS enabled
- Incoming port:
- Click OK, then Next to finish setup.
If you have an Enhanced mailbox, you can also sync calendars with CalDAV and contacts with CardDAV in Outlook.
