Email Setup: ActiveSync
ActiveSync / EAS - Sync Email, Calendars and Contacts
ActiveSync is available for Enhanced mailboxes and provides push sync for:
- Calendars
- Contacts
- Notes
If your domain has Autodiscover configured, your device may be able to find the settings automatically after you enter your email address and password.
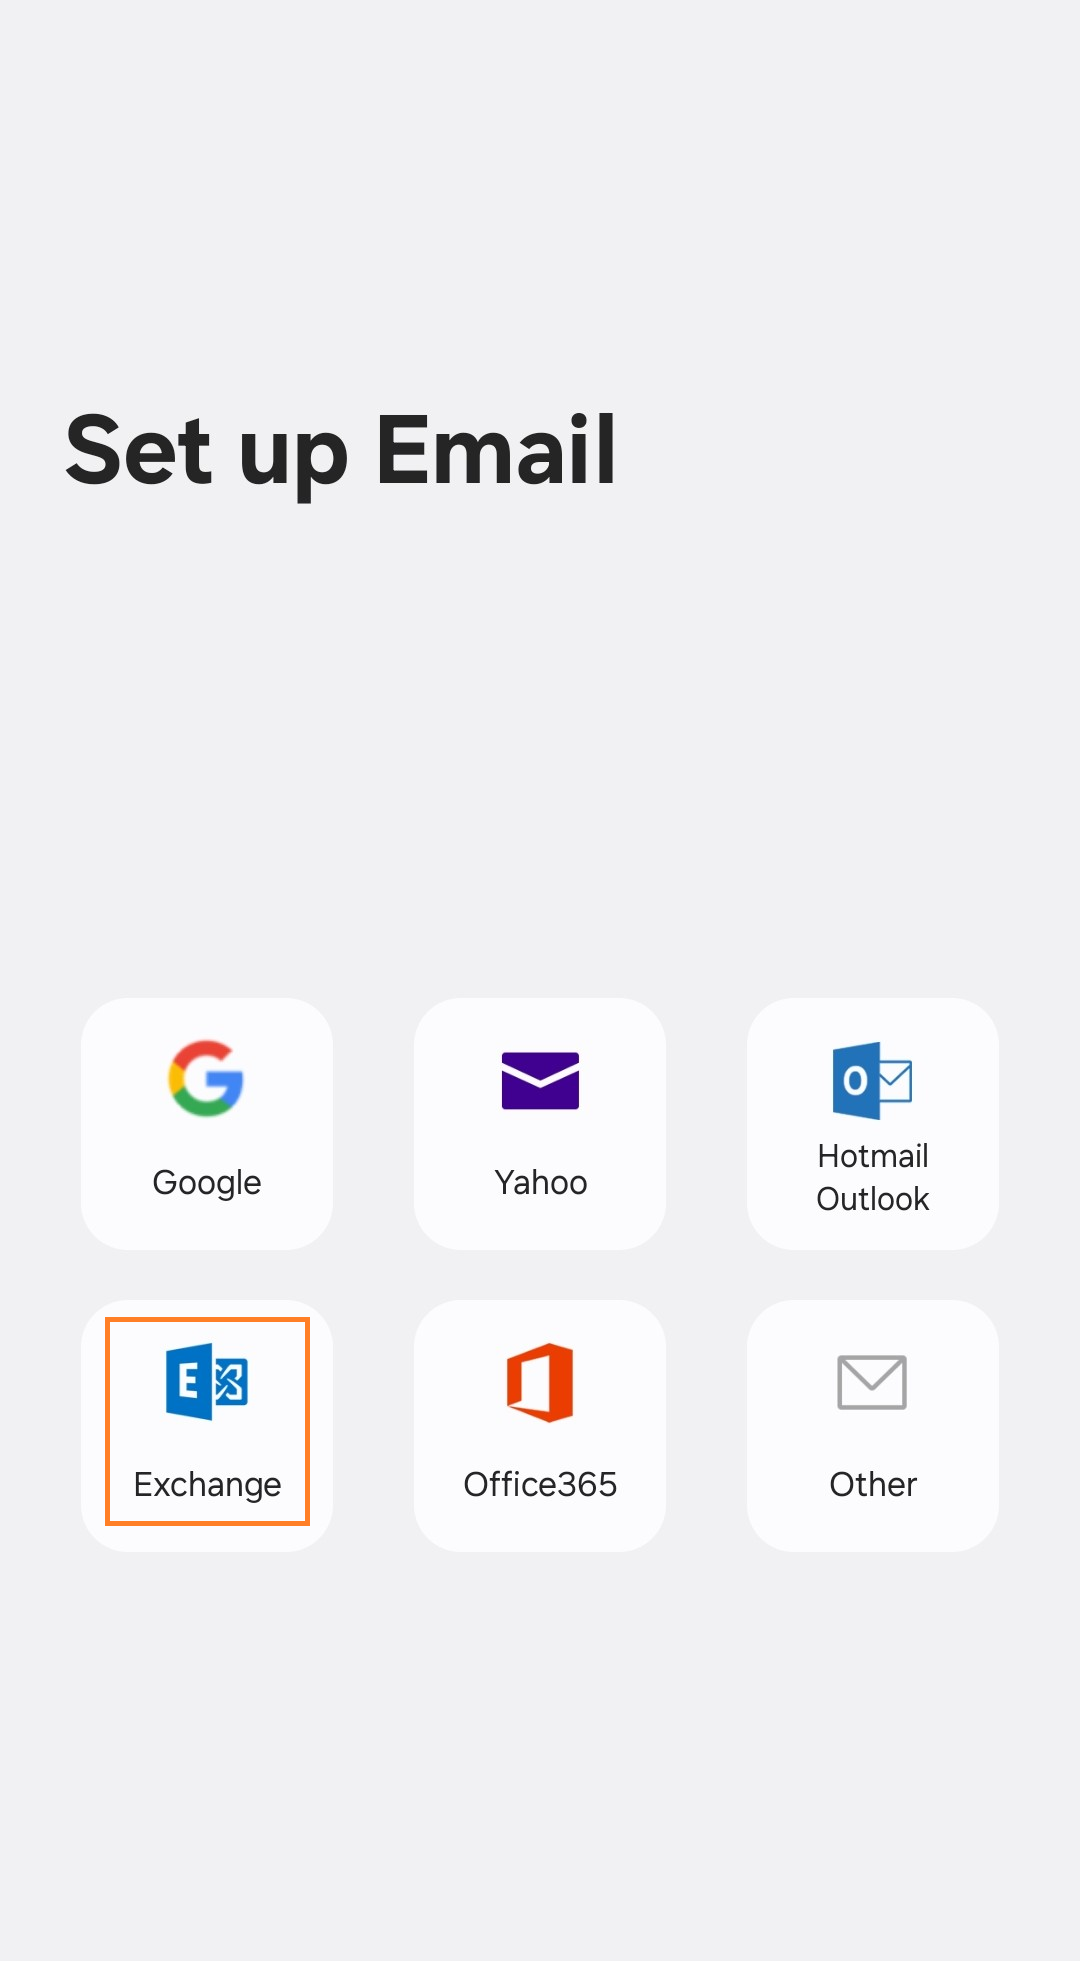
Automatic ActiveSync Setup
- Open Settings on your phone or tablet.
- Go to Mail, Accounts, or the equivalent account area.
- Tap Add Account.
- Choose Exchange, Microsoft Exchange, or ActiveSync.
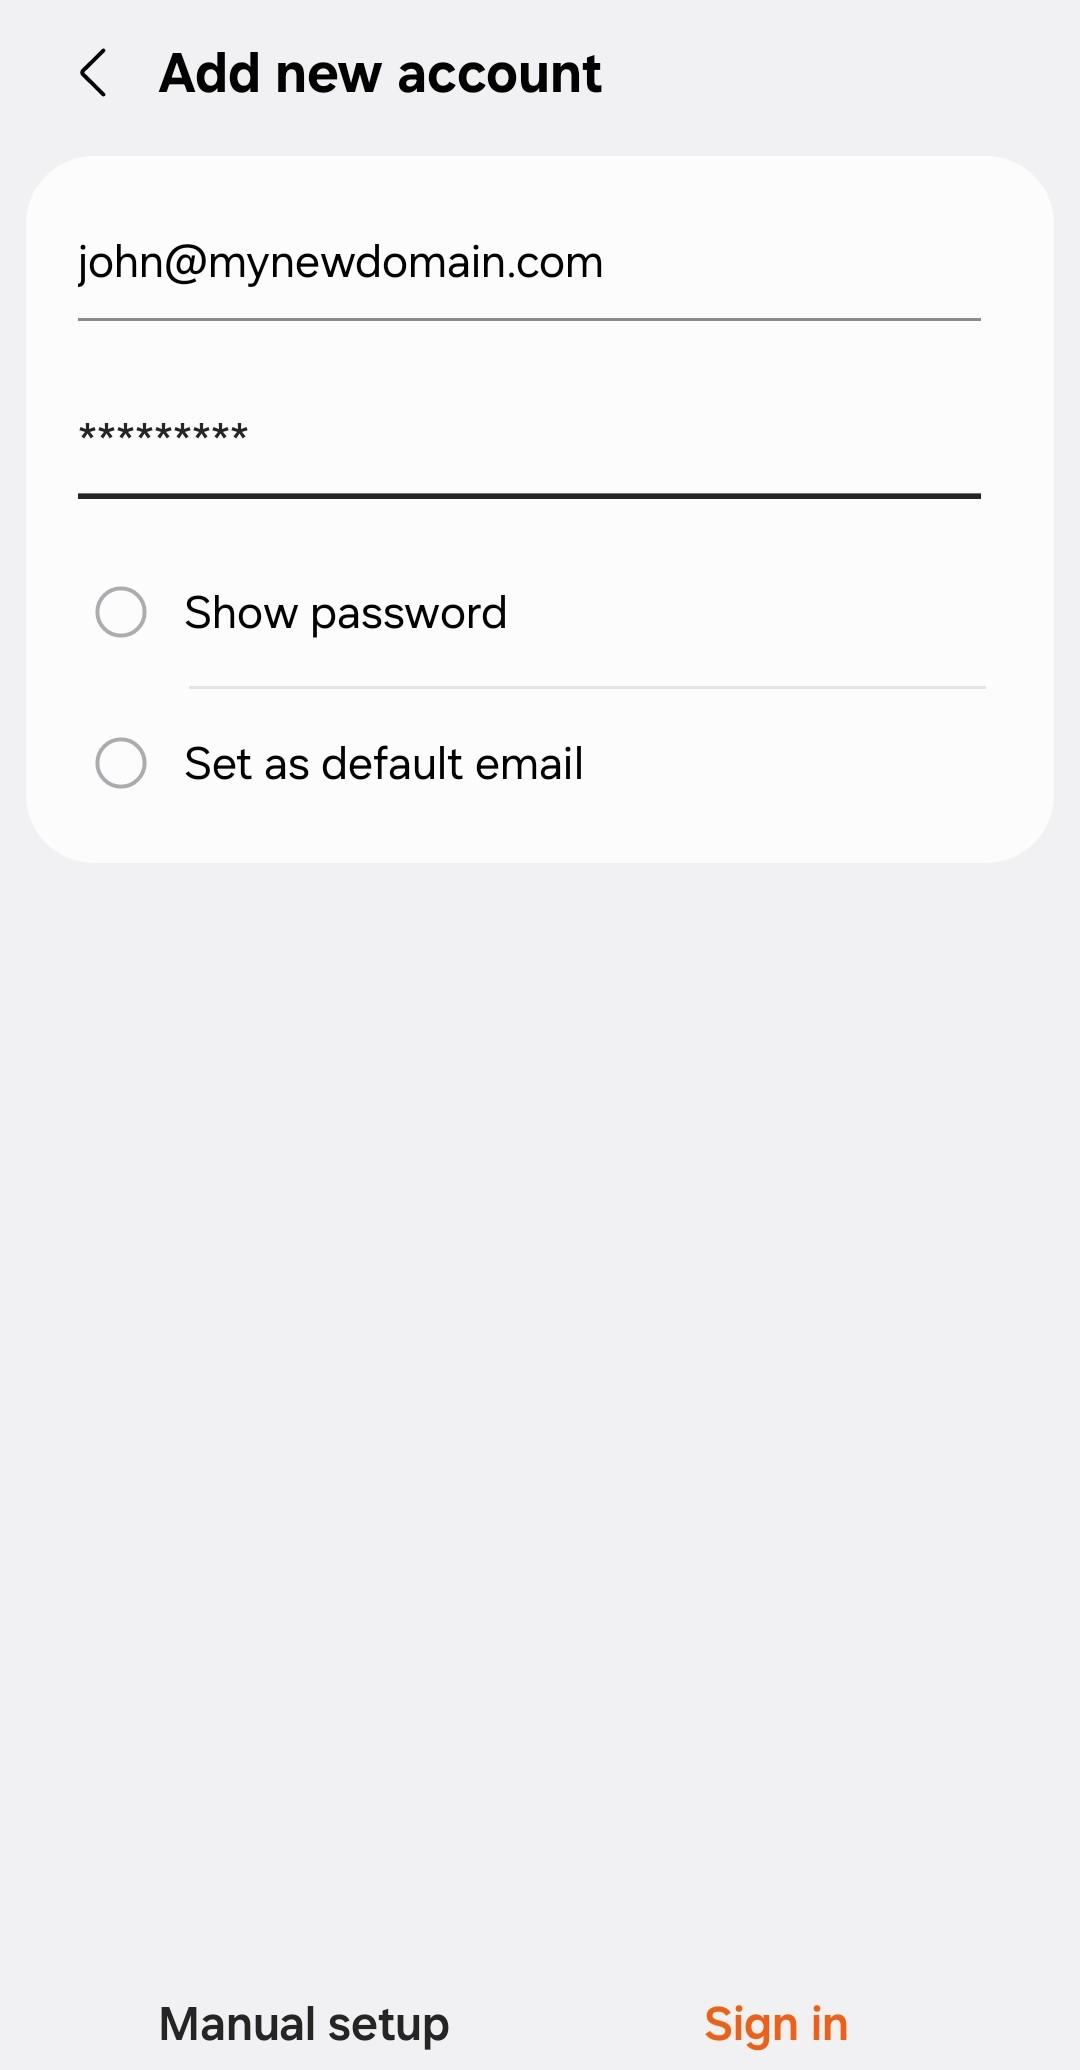
- Enter your full email address and password.
- Tap Sign In, Continue, or Finish.

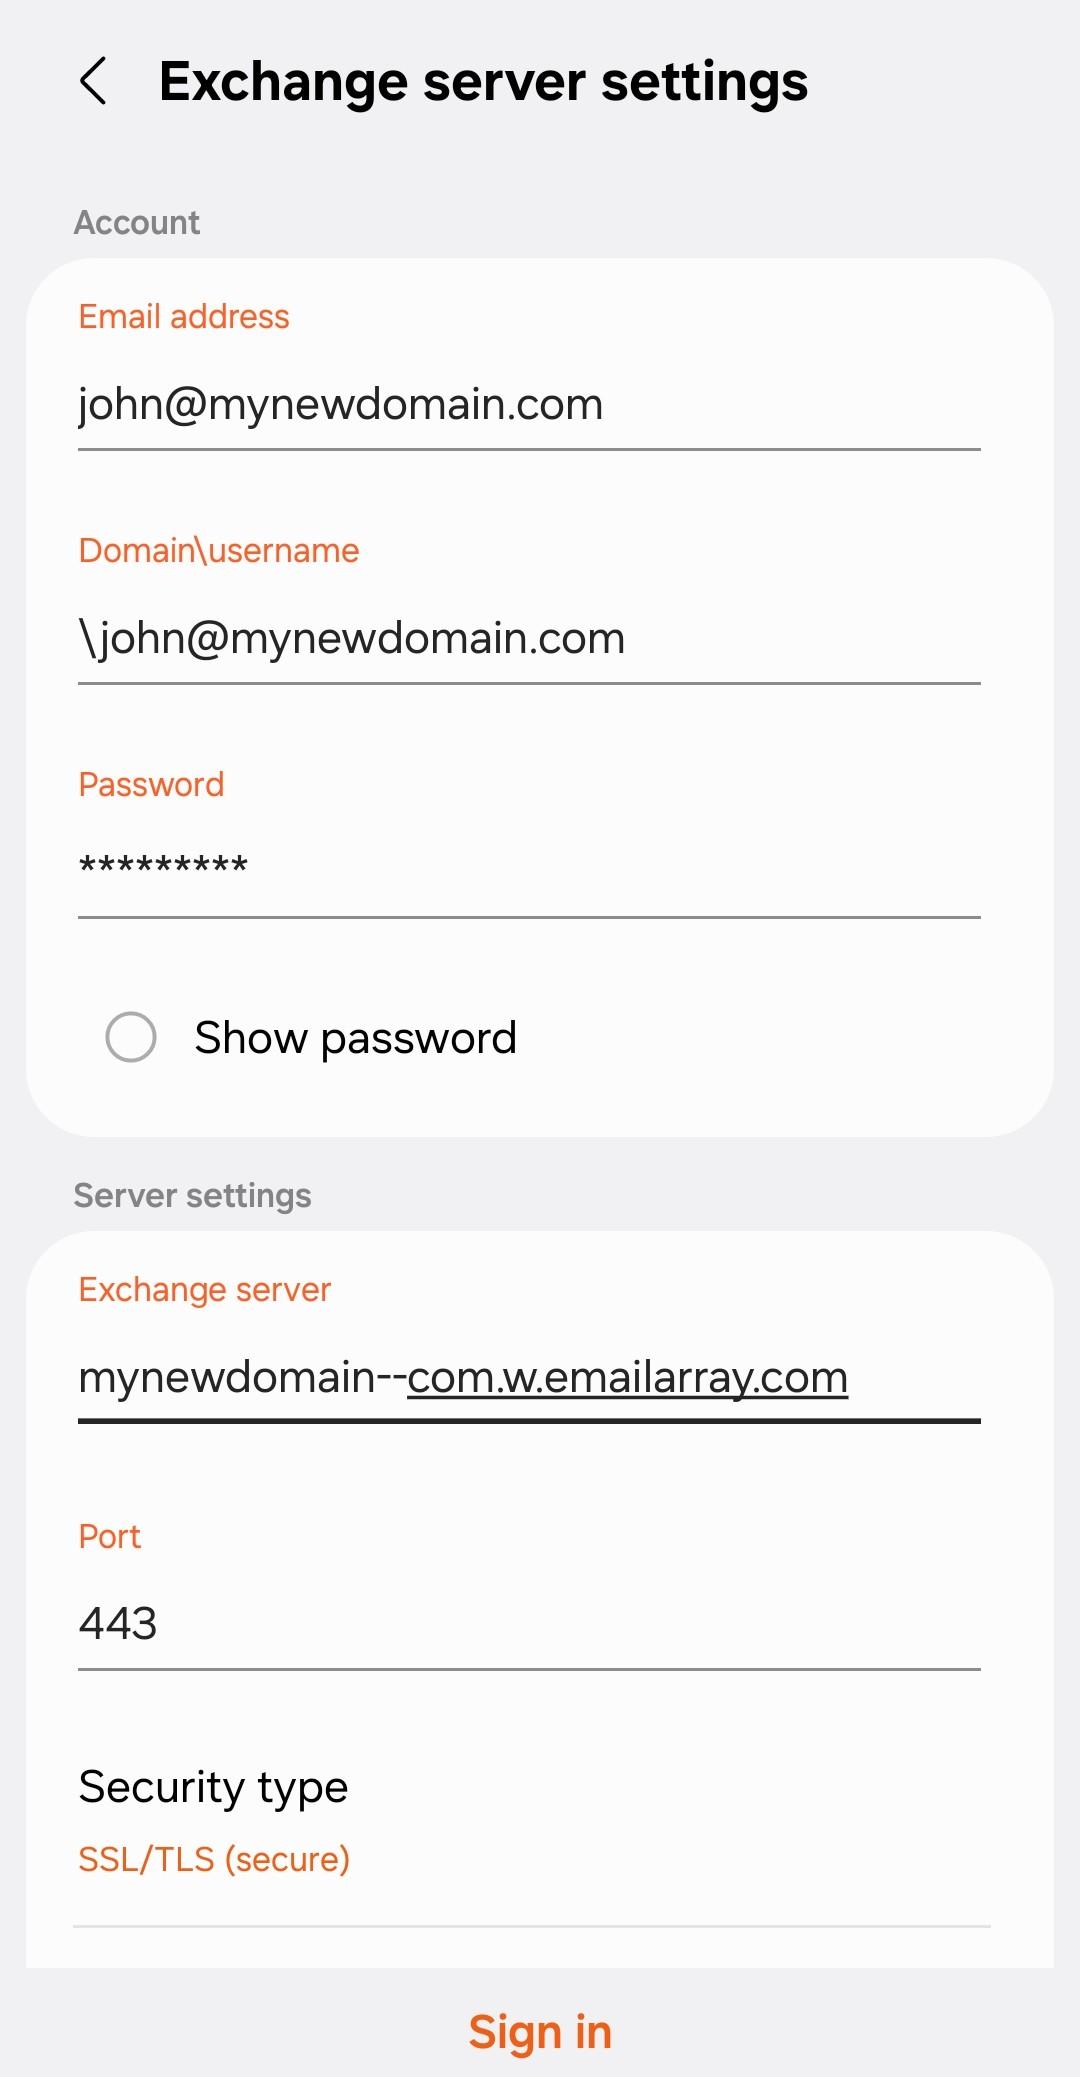
Manual ActiveSync Setup
- Open Settings on your phone or tablet.
- Go to Mail, Accounts, or the equivalent account area.
- Tap Add Account.
- Choose Exchange, Microsoft Exchange, or ActiveSync.
- Enter your email address and password.
- Choose Manual Setup if prompted.
- Enter the server address in this format:
yourdomain--com.w.emailarray.com
To build it:
- Start with your domain name.
- Replace each
.with--. - Add
.w.emailarray.comto the end.
Example:
my-company.com becomes my-company--com.w.emailarray.com
Then enter:
- Domain: leave blank unless your device requires it
- Username: your full email address
- Password: your mailbox password
- SSL: enabled
Tap Sign In, Continue, or Finish.