Email Setup: Create a New Outlook Profile
Creating a New Outlook Profile
When switching email providers, do not just change the server names on an existing Outlook profile. That often causes broken search, missing mail, or corrupted Outlook data files.
Creating a new Outlook profile is the safest approach.
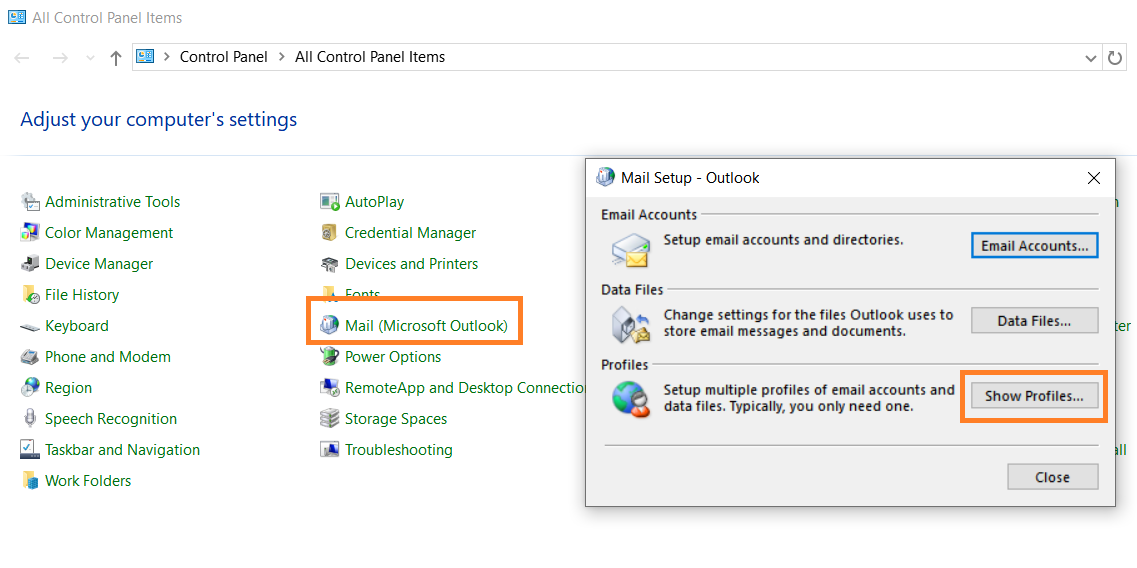
Step 1: Access the Mail Setup
- Close Outlook.
- Open the Windows Control Panel.
- Open Mail (Microsoft Outlook).
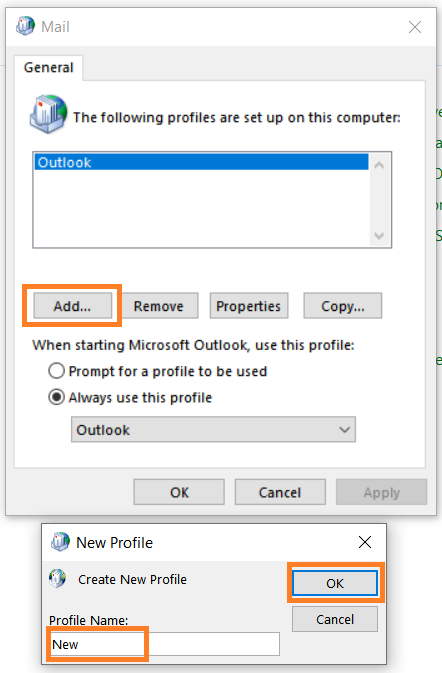
- Click Show Profiles...
- Click Add...
- Enter a name for your new profile.
- Click OK.
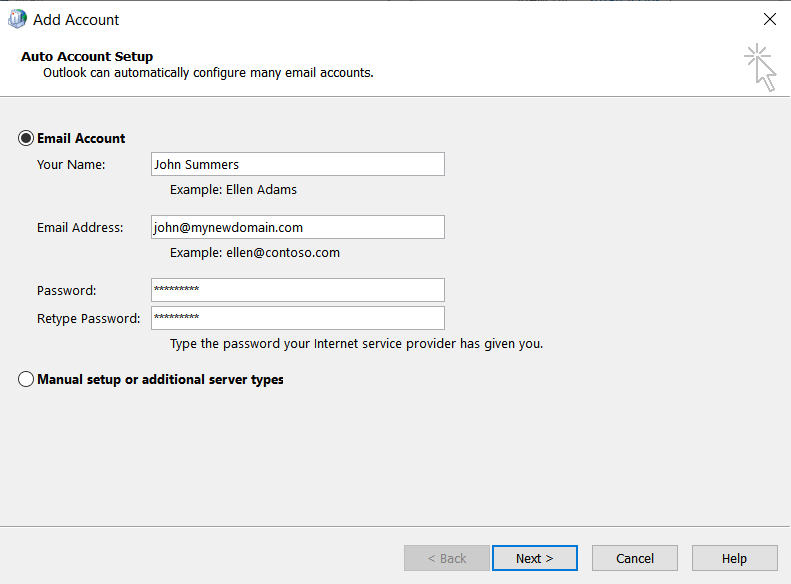
Step 2: Add the Email Account
Automatic setup
If your domain has Autodiscover configured:
- Enter your name, email address, and password.
- Click Next.
- Wait for Outlook to finish setup.
- Click Finish when you see the success screen.
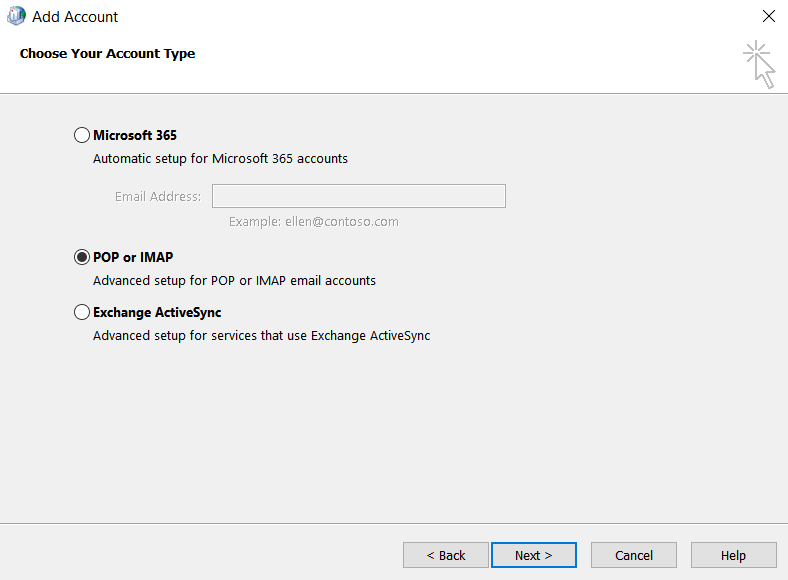
Manual setup
- Select Manual setup or additional server types and click Next.
- Choose POP or IMAP.
- Enter:
- Account Type:
IMAP - Incoming mail server:
imap.emailarray.com - Outgoing mail server:
smtp.emailarray.com - Username: your full email address
- Password: your mailbox password
- Account Type:
- Click More Settings.
- On the Outgoing Server tab, enable:
- My outgoing server (SMTP) requires authentication
- Use same settings as my incoming mail server
- On the Advanced tab, enter:
- Incoming port:
993 - Incoming encryption:
SSL/TLS - Outgoing port:
465 - Outgoing encryption:
SSL/TLS
- Incoming port:
- Click OK.
- Click Next to test the account.


Step 3: Launch the New Profile
- Return to the Mail window.
- Choose one of these options:
- Prompt for a profile to be used if you want to choose each time Outlook opens
- Always use this profile if you want the new profile to become the default
- Click Apply.
- Open Outlook.
Your new Outlook profile is ready to use.
